A tempting cream bun comes in various forms and flavors, each with its own unique charm. This coconut cream bun recipe is a classic Cantonese bread or pastry like Chinese hot dog, cocktail bun and garlic cheese breadsticks, pineapple buns, egg tarts and sugar donuts. A soft, pillowy dough meets a heavenly filling of creamy delight, every bite offers a symphony of flavors and textures. Let’s learn how to make these delicious Chinese coconut cream buns with step by step photos, tips, and a video tutorial for your treat, gatherings, or as a gift.
Love bread? Check out these focaccia, Japanese milk bread rolls, pan fried buns, garlic rosemary bread, dinner rolls, Thai chicken pizza, taro bun and custard bun recipes.

What is a cream bun?
Cream buns are popular treats and sweet pastry in many countries. Often, it is enjoyed as a dessert or snack with milk, tea or coffee. They can come in various shapes and sizes, but they are usually soft, fluffy, and indulgently sweet.
Typically, cream buns are made from enriched dough, such as a sweetened bread dough. Then, it is commonly filled with whipped cream or pastry cream. The bun is often split horizontally and the filling is spread or piped from bottom to top.
Chinese coconut cream bun:
Coconut cream buns, also known as naai jau gei lim baau (奶油忌廉包) in Cantonese or nǎiyóu bao (奶油包) in mandarin Chinese. They are a type of cream bun or sweet bun filled with a creamy filling. It originated in Hong Kong like Chinese hot dog, cocktail bun and garlic cheese breadsticks, pineapple buns, egg tarts and sugar donuts. Now, it is popular in various Asian countries and you can find them in some Asian bakeries or dessert shops.
Usually, the dough ingredients for Chinese coconut cream buns are flour, sugar, yeast, milk, eggs, and butter. Then, the dough is kneaded until smooth and elastic. After that, wait for the dough to rise until it doubles in size. After rising, the dough is divided into portions and shaped into buns.
Once the buns are baked and cool off. Cut open the buns horizontally. Then, brush a layer of melted unsalted butter on the buns and dip with chopped coconut flakes. Traditionally, Chinese coconut cream buns filling use butter and sugar, the butter and sugar beat until it smooths. Nowadays, many people like to use whipping cream and powdered sugar for the creamy filling. Then, the cream is piped or spooned into the center of each bun.
What does coconut cream bun taste like?
It has a deliciously rich and creamy flavor. The predominant taste in a coconut cream bun is the sweet creamy filling which has a smooth and indulgent texture. It adds a luxurious mouthfeel to each bite.
Also, coconut cream buns are usually sweet, but not overwhelmingly. The sweetness comes from both the cream filling and added sugar in the dough which creates a balanced sweetness. The bun or bread itself provides a soft and pillowy texture. It acts as a neutral backdrop to the rich creamy filling.
Besides, the buns dust or dip with chopped coconut flakes which add extra texture and coconut flavor. Overall, it's a treat that's both comforting and perfect for satisfying your sweet tooth.
You will love this coconut cream bun recipe:
There are different ways to make coconut cream buns. Some like to use the tangzhong method like sugar donuts. Some like to keep it simple and use other ingredients.
In this Chinese coconut cream bun recipe, the sweet bun is crucial and important. You want the bread to have a soft and pillowy texture. Therefore, ingredients and kneading technique are the key for a tasty cream bun. Knead the dough until it is smooth and elastic. When you pull and stretch a piece of dough it's thin like a film that can see through your hands is a good indicator that the dough is ready.
Besides, the creamy filling is sweet and creamy which adds extra creamy texture and sweetness to the bread. I will show you tips for how to make the cream stay better instead of melting and messy in this recipe. Also, I have tested and tried many times to develop this coconut cream bun recipe. My family loves these coconut cream buns and I hope you enjoy it as well. It’s great for parties and gatherings. Or, as a special gift.
Tools or equipments:
In order to make this delicious and soft cream buns, you need a mixer to knead the dough. Dough kneading is crucial for soft and fluffy bread. Therefore, using a mixer can help and develop a smooth and elastic dough. In this coconut cream bun recipe, I used a Bosch mixer machine. You can use other brands' stand up mixer machines to knead the dough.
Also, if you want to pipe the cream nicely, using a piping bag and tip will help and create a nicer pattern of pipe cream on the bread. If you don’t care about the look and do not have a piping bag and tip, you can use a plastic ziplock bag.
What are the ingredients for coconut cream buns?

There are 3 main parts for this Chinese coconut cream bun recipe. The bread dough, topping and filling.

For the bread dough, the ingredients are bread flour, vital wheat gluten, dough enhancer, eggs, salt, sugar, yeast, water and butter.

For the filling, the ingredients are heavy whipping cream, gelatin, water and powdered sugar.

The topping ingredients are egg, unsalted butter and unsweetened coconut flakes.
Substitutions:
Do I have to use vital wheat gluten and dough enhancer?
You don’t have to use them if you don’t have them. You can replace it with bread flour. However, adding vital wheat gluten and dough enhancer are helping and improving the texture of the dough. Even though when you refrigerate the bread, you don't need to warm them up and it still tastes wonderful and delicious.
Can I use regular all purpose flour?
Yes, you can use regular all purpose flour to make coconut cream buns. But, you need to keep in mind that the protein content in all purpose flour is slightly lower than bread flour. The texture will not be as good as bread flour.
On the other hand, bread flour has a higher protein content compared to all purpose flour, which helps create a stronger gluten structure in the dough. This can result in a slightly chewier and more elastic texture. Therefore, bread flour is desirable in bread products such as Japanese milk bread rolls, dinner rolls, garlic cheese breadsticks, ciabatta, and focaccia bread.
Using bread flour, the dough can contribute to a better rise and a more robust structure. It allows the buns to hold their shape well and develop a nice crumb. The higher protein content also helps the buns retain moisture, which can result in a softer and more tender texture.
Storage:
How to store cream buns?
If you plan on storing the leftover, the best is to not pipe the cream and dust with chopped coconut flakes. Place the cool off baked bread in an airtight container or a plastic bag. This helps to prevent them from drying out and keeps them fresh for a longer time. You can leave the bread out for 1-2 days or refrigerate them for 5-7 days.
When you are ready to consume them, take the bread out and pipe the cream. This way can maintain the freshness of the cream buns.
Can I refrigerate cream buns directly?
Yes, sure you can refrigerate cream buns with cream for 1-2 days. Cream buns contain dairy based fillings, whipping cream, refrigerating them can maintain the freshness of the cream and prevent it from spoiling quickly. Best to consume them as soon as possible.
How long can I leave it out?
You can leave the cream buns at room temperature for a short period around an hour. It is best to consume them as soon as possible for its freshness.
Can I freeze cream buns?
Yes, you can freeze cream buns to extend the shelf life. The best is to not pipe the cream and dust with chopped coconut flakes. Just freeze the bread after the baked buns cool off. Place them into a freezer safe plastic bag. The bread can freeze for up to 2-3 months without significant loss of quality.
When you're ready to enjoy the cream buns, remove them from the freezer and let them thaw in the refrigerator overnight. Or, you can thaw them at room temperature for a few hours. Then, you can reheat them in the oven at a low temperature, around 300°F for 5-10 minutes. Let the bread cool off, then pipe the cream into the buns.
Reheat:
Can I reheat cream buns?
Yes, you can reheat the buns, but not the whole cream bun. You can microwave the bread for 10 seconds if it is straight out from the fridge. Or, you can warm it up in the oven at a low temperature around 300°F for a few minutes. Let the bun cool off, then pipe the cream.
Remember do not warm up the whole cream bun as it may cause the cream filling to melt and the buns to become soggy. In this coconut cream bun recipe, I used vital wheat gluten and dough enhancer which help and make the dough texture soft and fluffy. Even after refrigerating the cream buns, the texture of bread still tastes amazing without warming up.
Cooking tips for how to make Chinese coconut cream buns:
Dough preparation:
- Use bread flour for a better texture.
- Knead the dough until it's smooth and elastic. This develops gluten, giving the buns their soft and fluffy texture.
- I like to use a Bosch mixer for kneading the dough. Let the machine run and knead the dough for 10 minutes, then add diced butter into the dough and let it run for another 10 minutes.
- When you take a piece of dough out and stretch it, you can see through but not break easily. It is a good indicator that the dough is ready.
- After that, spray some oil into a mixing bowl and put the dough in. Cover the dough with a wet cloth. Let it rise until it doubles in size.
- My trick to speed up rising time, preheat the oven at 200 F. Then, turn off the oven and place the dough covered with a wet cloth in the oven for 45 minutes.
Filling:
- Put gelatin in a bowl and add water. Mix it well. Put it in the microwave for 10-15 seconds. Let it cool off a little bit.
- Pour heavy whipping cream, powdered sugar and the gelatin mixture into the mixing bowl. Use an electric mixer to beat it until the cream is thick. It takes around 13 minutes to beat the cream.
- You can refrigerate the cream for 30 minutes before piping into the buns.
Assembly and baking:
- After the dough has risen, divide it into 10 portions. If you want the buns to look even, weigh the dough and divide 10.
- Flatten the dough into a long shape then roll from top to bottom, pinch together to seal it and shape it into an oval.
- Place the bread on a baking sheet lined with parchment paper, cover with a wet towel and let them rise for another 15 minutes until they double in size. My trick to speed up rising time, preheat the oven at 200 F. Then, turn off the oven and place the dough covered with a wet cloth in the oven for 15 minutes.
- Before baking, brush the tops of the buns with an egg wash. This gives the buns a shiny golden crust.
- Preheat the oven at 350°F, bake them for 15-20 minutes, or until they are golden brown. I did it for 18 minutes.
- Allow the buns to cool off completely on a wire rack before piping cream into the bread.
- After the bread is cool off, cut open the top. Then, brush a layer of melted unsalted butter. Dip the top bread with chopped coconut flakes. Lastly, pipe the cream into the buns from the bottom to top. Pipe more cream if you like cream.
FAQs:
Yes, you can make the buns in advance. However, it's best to fill them with cream shortly before serving to maintain freshness and prevent the buns from becoming soggy. You can prepare the buns ahead of time and assemble the filing just before serving.
To prevent cream from leaking out of the buns, make sure the buns are completely cooled before piping the cream. Additionally, in this coconut cream bun recipe, I add gelatin into the heavy whipping cream which helps hold up the cream.
Cream buns can be adapted to accommodate various dietary restrictions, such as gluten-free, dairy-free, or vegan diets. You may need to alter or substitute the ingredients and test it out.
Instructions for how to make Chinese coconut cream buns:

Yeast mixture:
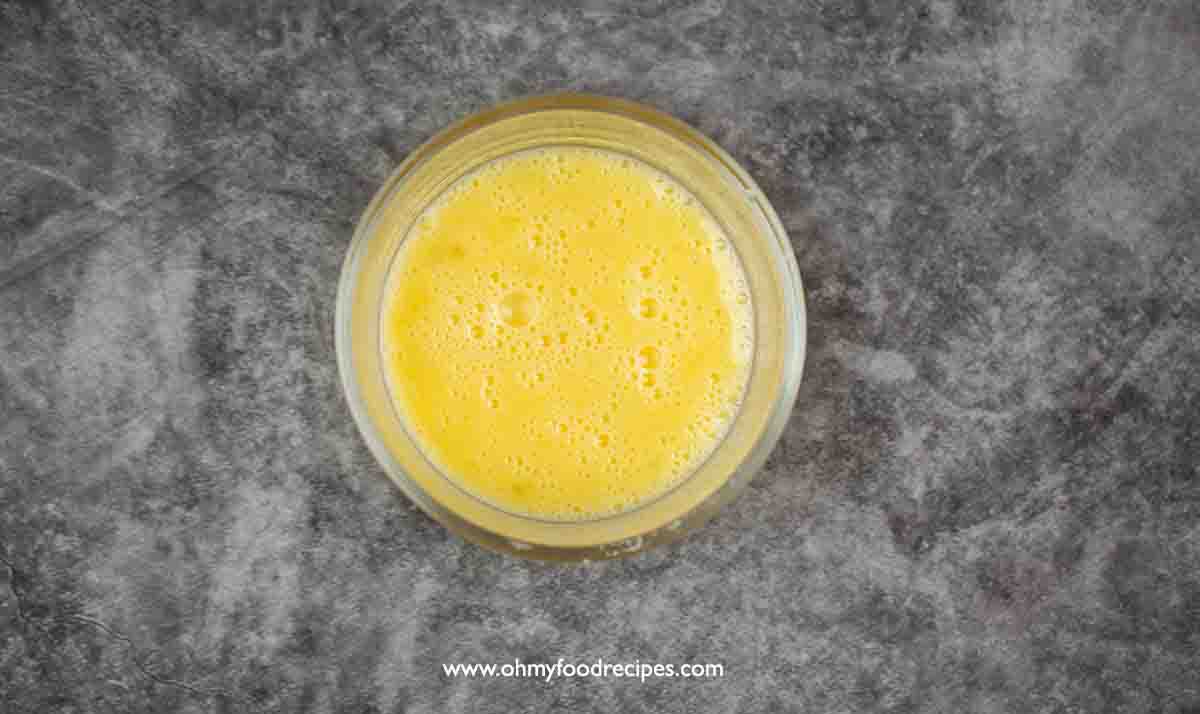
1. Pour ½ cup of water into the Bosch mixer. Then, add 5 tablespoons of sugar.

2. After that, add 3 teaspoons of yeast and crack 2 large eggs (2 oz each).

3. Turn on the mixer at the lowest setting #1. Let it mix a little bit and wait 5 minutes.

4. In a container, pour 2 cups & 2 tablespoons of bread flour, ½ teaspoon of salt, ½ tablespoon of dough enhancer and ½ tablespoon of vital wheat gluten. Mix it well. (You can replace the dough enhancer and vital wheat gluten with bread flour if you don’t have it.)

Mixing dough:
5. Next, turn on the mixer at the lowest setting # 1. Add the flour mixture from step 4 into the yeast mixture step 3 slowly.

6. After, cover the lid and change the mixer setting to medium high #3 speed. Let it run for 10 minutes.

7. Dice 2 tablespoons of butter into small cubes.

8. Open the lid, add the diced butter into the dough. Then, cover the lid. Let it run another 10 minutes.

9. Pull and stretch a piece of dough, like a film and you can see through your hand. Then, the dough is ready. (If the dough is still sticky, you can run it longer.)

Dough rising:
10. Spray a layer of oil into the bowl and put the dough into the bowl.

11. Cover the dough with a wet cloth and let it rise to double in size. (My trick to speed up the rising time is to preheat the oven at 200 F. Then, turn off the oven. Put the dough in the oven covered with a wet cloth for 45 minutes.)

Cream filling:
12. While waiting for the dough to rise, work on the filling. Put 2 teaspoons of gelatin into the bowl and add 5 tablespoons of water. Mix it well. Then, microwave it for 10-15 seconds. Let it cool off a little bit.

13. Pour 1 cup of heavy whipping cream into the mixing bowl, the gelatin mixture from step 12, and ¾ cup of powdered sugar.

14. Use an electric mixer to beat the cream until it thickens. (I beat it for 13 minutes.)

15. Put a piping tip into a piping bag and cut a hole at the tip.

16. The following step, scoop the cream into the piping bag and refrigerate for 30 minutes while working on the dough.

17. Once the dough rises to double in size and ready.

Divide and shape the dough:
18. Take the dough out and roughly divide the dough into 10 portions. (If the dough is a little sticky, you can spray some oil on your hands, knead it a little bit, or wear gloves.)

19. Take a piece of dough, stretch and flatten it like a rectangle shape.

20. Roll the dough into an oval shape.

21. Repeat and finish the rest of the dough. Cover the dough and let it rise for 15 minutes. (My trick to speed up the rising time is to preheat the oven at 200 F. Then, turn off the oven. Put the dough in the oven covered with a wet cloth for 15 minutes.)
22. Beat a large egg in the container.

Brush egg wash:
23. When the dough rises, brush the egg wash on the dough bun.

Baking:
24. Preheat the oven at 350 F and bake at 350 F for 15-20 minutes. (I did it for 18 minutes.)

25. Let the buns cool off on the wire rack completely.

Topping:
26. Put ½ cup of unsweetened coconut flakes (1.3 oz) into the chopper and chopped until small pieces. And, put the chopped coconut flakes on the plate.

27. When the buns are cool off completely. Cut open the buns.

28. Melt 1 tablespoon of unsalted butter in the microwave for 10-15 seconds.

29. Bush a layer of unsalted butter on the bun.

30. After that, dip the top part of the bun on the chopped coconut flakes from step 26.

31. Lastly, pipe the cream into the bun.

Enjoy this delicious coconut cream bun recipe for your treat or gatherings! Also, check out these taiyaki, pineapple cake, musubi, walnut shrimp, banana bread muffin, crispy noodles, and salt & pepper squid recipes.
You May Also Like These Recipes:
Subscribe Oh My Food Recipes to get our new recipes delivered straight to your inbox! Follow along on Facebook, Pinterest and Instagram for all the latest updates.

Cream Bun
Equipment
- 1 Bosch mixer (Can use any brand of mixer)
- 1 Electric mixer
- 1 Piping bag
- 1 Piping tip
- 1 Chopper
Video
Ingredients
Dough:
- 2 cups and 2 tablespoons Bread flour
- ½ tablespoon Vital wheat gluten (Can replace with bread flour)
- ½ tablespoon Dough enhancer (Can replace with bread flour)
- ½ teaspoon Salt
- ½ cup Water
- 5 tablespoons Sugar
- 3 teaspoons Yeast (Active dry yeast)
- 2 large Eggs (2 oz each)
- 2 tablespoons Butter
Filling:
- 2 teaspoons Gelatin
- 5 tablespoons Water
- 1 cup Heavy whipping cream
- ¾ cup Powdered sugar
Topping:
- 1 large Egg (Egg wash brush on the buns)
- 1 tablespoon Unsalted butter
- ½ cup Coconut flakes unsweetened (1.3 oz)
Instructions
- Pour ½ cup of water into the Bosch mixer. Then, add 5 tablespoons of sugar.
- After that, add 3 teaspoons of yeast and crack 2 large eggs (2 oz each).
- Turn on the mixer at the lowest setting #1. Let it mix a little bit and wait 5 minutes.
- In a container, pour 2 cups & 2 tablespoons of bread flour, ½ teaspoon of salt, ½ tablespoon of dough enhancer and ½ tablespoon of vital wheat gluten. Mix it well. (You can replace the dough enhancer and vital wheat gluten with bread flour if you don’t have it.)
- Next, turn on the mixer at the lowest setting # 1. Add the flour mixture from step 4 into the yeast mixture step 3 slowly.
- After, cover the lid and change the mixer setting to medium high #3 speed. Let it run for 10 minutes.
- Dice 2 tablespoons of butter into small cubes.
- Open the lid, add the diced butter into the dough. Then, cover the lid. Let it run another 10 minutes.
- Pull and stretch a piece of dough, like a film and you can see through your hand. Then, the dough is ready. (If the dough is still sticky, you can run it longer.)
- Spray a layer of oil into the bowl and put the dough into the bowl.
- Cover the dough with a wet cloth and let it rise to double in size. (My trick to speed up the rising time is to preheat the oven at 200 F. Then, turn off the oven. Put the dough in the oven covered with a wet cloth for 45 minutes.)
- While waiting for the dough to rise, work on the filling. Put 2 teaspoons of gelatin into the bowl and add 5 tablespoons of water. Mix it well. Then, microwave it for 10-15 seconds. Let it cool off a little bit.
- Pour 1 cup of heavy whipping cream into the mixing bowl, the gelatin mixture from step 12, and ¾ cup of powdered sugar.
- Use an electric mixer to beat the cream until it thickens. (I beat it for 13 minutes.)
- Put a piping tip into a piping bag and cut a hole at the tip.
- The following step, scoop the cream into the piping bag and refrigerate for 30 minutes while working on the dough.
- Once the dough rises to double in size and ready.
- Take the dough out and roughly divide the dough into 10 portions. (If the dough is a little sticky, you can spray some oil on your hands, knead it a little bit, or wear gloves.)
- Take a piece of dough, stretch and flatten it like a rectangle shape.
- Roll the dough into an oval shape.
- Repeat and finish the rest of the dough. Cover the dough and let it rise for 15 minutes. (My trick to speed up the rising time is to preheat the oven at 200 F. Then, turn off the oven. Put the dough in the oven covered with a wet cloth for 15 minutes.)
- Beat a large egg in the container.
- When the dough rises, brush the egg wash on the dough bun.
- Preheat the oven at 350 F and bake at 350 F for 15-20 minutes. (I did it for 18 minutes.)
- Let the buns cool off on the wire rack completely.
- Put ½ cup of unsweetened coconut flakes (1.3 oz) into the chopper and chopped until small pieces. And, put the chopped coconut flakes on the plate.
- When the buns are cool off completely. Cut open the buns.
- Melt 1 tablespoon of unsalted butter in the microwave for 10-15 seconds.
- Bush a layer of unsalted butter on the bun.
- After that, dip the top part of the bun on the chopped coconut flakes from step 26.
- Lastly, pipe the cream into the bun.
Notes
Cooking tips for how to make Chinese coconut cream buns:
Dough preparation:
- Use bread flour for a better texture.
- Knead the dough until it's smooth and elastic. This develops gluten, giving the buns their soft and fluffy texture.
- I like to use a Bosch mixer for kneading the dough. Let the machine run and knead the dough for 10 minutes, then add diced butter into the dough and let it run for another 10 minutes.
- When you take a piece of dough out and stretch it, you can see through but not break easily. It is a good indicator that the dough is ready.
- After that, spray some oil into a mixing bowl and put the dough in. Cover the dough with a wet cloth. Let it rise until it doubles in size.
- My trick to speed up rising time, preheat the oven at 200 F. Then, turn off the oven and place the dough covered with a wet cloth in the oven for 45 minutes.
Filling:
- Put gelatin in a bowl and add water. Mix it well. Put it in the microwave for 10-15 seconds. Let it cool off a little bit.
- Pour heavy whipping cream, powdered sugar and the gelatin mixture into the mixing bowl. Use an electric mixer to beat it until the cream is thick. It takes around 13 minutes to beat the cream.
- You can refrigerate the cream for 30 minutes before piping into the buns.
Assembly and baking:
- After the dough has risen, divide it into 10 portions. If you want the buns to look even, weigh the dough and divide 10.
- Flatten the dough into a long shape then roll from top to bottom, pinch together to seal it and shape it into an oval.
- Place the bread on a baking sheet lined with parchment paper, cover with a wet towel and let them rise for another 15 minutes until they double in size. My trick to speed up rising time, preheat the oven at 200 F. Then, turn off the oven and place the dough covered with a wet cloth in the oven for 15 minutes.
- Before baking, brush the tops of the buns with an egg wash. This gives the buns a shiny golden crust.
- Preheat the oven at 350°F, bake them for 15-20 minutes, or until they are golden brown. I did it for 18 minutes.
- Allow the buns to cool off completely on a wire rack before piping cream into the bread.
- After the bread is cool off, cut open the top. Then, brush a layer of melted unsalted butter. Dip the top bread with chopped coconut flakes. Lastly, pipe the cream into the buns from the bottom to top. Pipe more cream if you like cream.


Leave a Reply