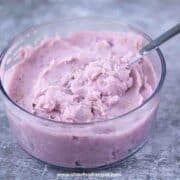
Taro Paste
Taro paste is a popular Asian sweet filling. It is great to use for buns, bread, mochi and taiyaki, just like red bean paste. In this taro paste filling recipe, it has both instant pot and stove top methods to guide you.
Servings 15
Calories 134kcal
Equipment
- 1 Pressure cooker or Pot
Ingredients
- 1.5 pounds Taro (After peeling off skin)
- 2 cups Water (2 cups for instant pot method, 5 cups for stove top method.)
- 1 cup and 2 tablespoons Sugar
- ½ cup Coconut milk
- ¼ cup Taro boba powder
Milk Cornstarch Mixture:
- ¼ cup Milk (2% fat milk)
- 4 tablespoons Cornstarch
Instructions
Instant Pot Method:
- Peel and wash a medium-sized taro.
- Cut the taro into cubes. (In this recipe, I used 1.5 pounds of taro.)
- Then, put 1.5 pounds of diced taro into the Instant Pot pressure cooker.
- Pour 2 cups of water into the Instant Pot.
- Close the lid and vent, push the manual button to adjust time for 5 minutes at high pressure and natural release pressure.
- When the taro is done, drain the water.
- After that, put the drained and cooked taro into the instant pot pressure cooker. Then, mash the cooked taro.
- Mash the taro until it's a paste-like consistency.
- Next, add 1 cup and 2 tablespoons of sugar into the taro paste.
- Pour ½ cup of coconut milk. Then, mix it well.
- After, add ¼ cup of taro boba powder into the paste and mix it well.
- In a small container, put ¼ cup of milk (I use 2% fat milk) and 4 tablespoons of cornstarch. Mix it well.
- After, push the sauté button and pour the milk cornstarch mixture from step 12.
- Keep stirring until it thickens or until you like the viscosity. Be careful it is hot and keep stirring to prevent burning at the bottom. (When the filling cools down, it will be paste-like.)
Stove Top Method:
- Peel and wash a medium-sized taro.
- Cut the taro into cubes. (In this recipe, I used 1.5 pounds of taro.)
- Then, put 1.5 pounds of diced taro into a pot.
- Pour 5 cups of water into the pot. Make sure the water covers the taro.
- Turn on medium-low heat and let it boil for 20-30 minutes until the taro is soft.
- When the taro is done, drain the water.
- After that, put the drained and cooked taro into a non-stick pot or pan. Then, mash the cooked taro.
- Mash the taro until it's a paste-like consistency.
- Next, add 1 cup and 2 tablespoons of sugar into the taro paste.
- Pour ½ cup of coconut milk. Then, mix it well.
- Afterward, add ¼ cup of taro boba powder into the paste and mix it well.
- In a small container, put ¼ cup of milk (I use 2% fat milk) and 4 tablespoons of cornstarch. Mix it well.
- After, turn on a small fire and pour the milk cornstarch mixture from step 12.
- Keep stirring until it thickens or until you like the viscosity. Be careful it is hot, and keep stirring to prevent burning at the bottom. (When the filling cools down, it will be a paste-like consistency.)
Video
Notes
Expert Tips for Smooth and Creamy Taro Paste
- Cut the taro into similar-sized pieces: Peel, wash, and cut the taro into evenly sized cubes so they cook at about the same rate.
- Cook the taro until very soft: For the Instant Pot method, pressure cook the taro on High Pressure for 5 minutes, followed by a natural pressure release. For the stovetop method, boil the taro for about 20–30 minutes, or until it is very soft and easy to mash. Properly cooked taro is important for creating a smooth paste.
- Drain the taro well: After cooking, drain off the excess water before mashing. Too much water can make the taro filling thin and require more cooking time to thicken.
- Mash while the taro is warm: Warm taro is much easier to mash. Mash it thoroughly before adding the sugar and coconut milk to help create a smoother consistency.
- Keep stirring as the paste thickens: When using the sauté function, add the milk and cornstarch mixture and stir continuously until the taro paste reaches your desired consistency. The mixture can burn easily as it thickens, so don't leave it unattended.
- Use low heat for the stovetop method: A nonstick pot or pan works best. Cook the taro mixture over low heat and stir frequently to prevent it from sticking or burning on the bottom.
- Don't make the paste too thick: Taro paste continues to thicken as it cools. Stop cooking when it is slightly softer than your desired final consistency.
Nutrition
Calories: 134kcal | Carbohydrates: 29g | Protein: 1g | Fat: 2g | Saturated Fat: 2g | Polyunsaturated Fat: 1g | Monounsaturated Fat: 1g | Cholesterol: 1mg | Sodium: 10mg | Potassium: 290mg | Fiber: 2g | Sugar: 15g | Vitamin A: 41IU | Vitamin C: 2mg | Calcium: 27mg | Iron: 1mg
